Our Christmas Cottage 2014

 I just about missed the fun!
Can you believe....
all this decorating that we do, and....
NO POST!!
Haha, 
Yeah, its late but I really want to show you!

Come on in..


I  tried my hand at a paper wreath! So much fun and 
I love the warmth they add to a room.


Did you see that?
I was given this large galvanized tub...
my tree stand fit perfectly inside it!


I don't want to hide the tub with presents...
so they are at a minimum for now.  :)


Our shelves got some twinkle lights.
I like to put them on a timer so
I can just leave them to do their thing...


Our dining room table...


Our 2014 Santa...


Thanks for stopping by!


We Wish you a Wonderful Holiday!
We hope you get to have some
special moments to cherish for always.


I am linking up with

AKA Design and Life

Woodland Wreath


Can you believe?
...
We are almost into December!!!

This is probably the funnest decorating time for me.  The layers of greenery,
silver and gold, lots of bling.,..
I love it.

I decided to start decorating outside first.
 I have been collecting items for this project over
 the last month or so.
I picked up this ribbon early, and I am so glad I did,
the burlap ribbon has sold out!!

 I thought I would share how
I layer a wreath.


I like to re-use the base
 for my wreaths.  This has been used for
my Christmas wreaths for over 12 years.
I have a different one for each season
that I  keep re-using.

Under this greenery is just a basic grape vine wreath.
I kept the greenery on from last Christmas...I was planning 
on flocking it, but I wasn't ready for the mess this year.
Maybe next year...


After I was happy with the way the branches were lying
I applied a coat of glitter/glue almost everywhere,
along the branches and pine cones.


Then came the snowflake wire ribbon 
and the mercury ornaments.


After wrapping the ribbons around and around,
I stabilized them with a large bow.
Tucking it into branches and pine cones.


I bought this snowflake ornament at Micheal's as well.
The  snowflake was rusty brown, so I chalk painted
it with lighter grey then darker grey on top.  Once dry, I
sanded it gently and sealed it with
glittery topcoat.


It is soooo cold outside this weekend...but
once it warms up a little, and my camera doesn't
fog up...I will get some pictures from farther away.


Hope you enjoyed my version of a 
Woodland Christmas Wreath.
Happy Decorating!

Our Halloween Cottage


Thanks for stopping in!
Now that life has settled a little bit,
and things are at a slightly more managable pace,
I have been able to do my decorating for Halloween.


Usually the front window has a few candles on the sill,
but this year I wanted a little more.
Silhouettes!
This was so much fun to do.
All I needed was black poster paper and
some sticky tack!


I followed a pattern on my pinterest board,
cut it out and sticky tacked it onto the window.
I added a string of orange led lights just to add
a little glow for the night time.


A new little owl to greet you at our door,
 ready and waiting for trick or treaters.
He seems to fill up this corner very well.


This fence panel pumpkin was at VV!
He's a little crazy looking, but cute.


My front door wreath got a fresh look.
I striped everything off of the old one,
wrapped the purple boa around and around, added
a few different ribbons, black flowers and string
to make it messy and magical.  Then I
topped it with a few twisty, sparkly, stretchy sticks
to add a little bling.


"Come in my Pretty", my witch is waiting for you!


I think she has had too much candy :s

The cauldron is filled with poly fill.
For Halloween I put a few glow sticks
 underneath the fill.
It ends up looking like it is foaming over.
Toxic.


A few brooms, if you want to take
a ride.


This witch was the center of my wreath last year.
She has definitely seen better days!


The corner of our living room got a
new ladder, a spooky tea towel and my favorite
skull necklace.


Crows, spiders, candles, pumpkins...


Spooky!


My favorite spot...
our dining room.
Over the last few months we inherited a
beautiful Welsh Dresser. Lovely to look at but, better
yet, this piece is rich with family history.  
I love it.
This welsh dresser sits in this nook like the house
was built around it.  I couldn't believe how
perfectly it fit.
Thank you Grandma.
xox


Well, there you have it!
I hope you enjoyed my Halloween Tour,
it's always so much fun to do, I am glad I
could share it with you!


Let's go Glamping!


Are you having a good summer?


It seems like it is never long enough!
So,when we get a chance to head out into the great outdoors...
We take it!!
This trailer has been a wonderful home for some great adventures.
Well used,
and more then ready for a little updating! 


Before it had dated valances, dusty rose and blue
wall paper, and an awkward table and chairs.


We painted the walls off white and left the cupboards,
they are still banged and scraped, but thats ok...
it adds to the character....for now ;)
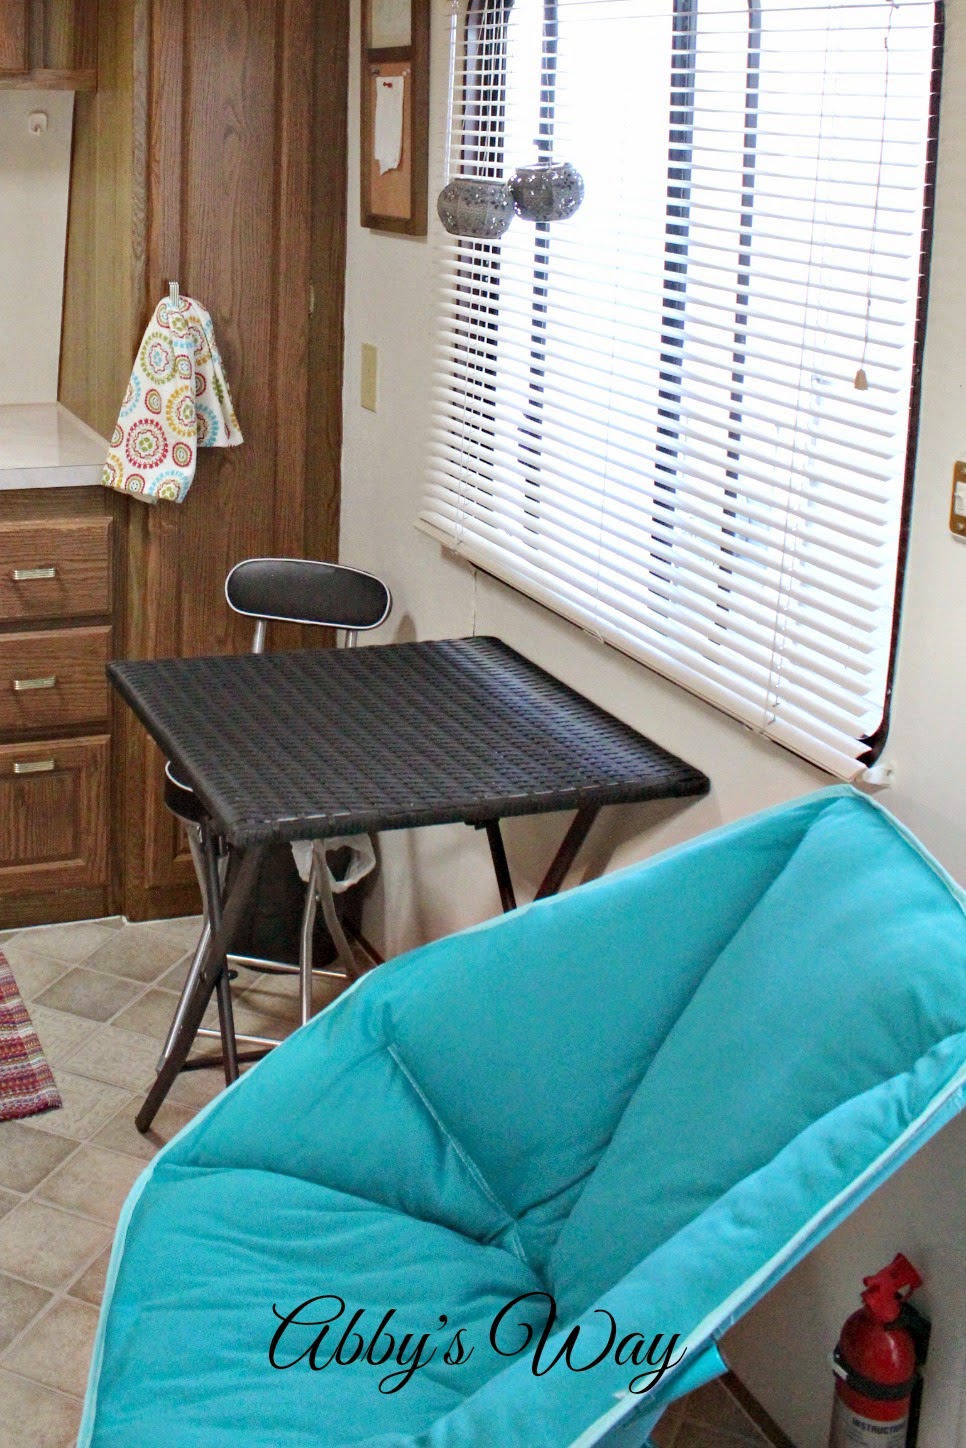
Before we had to stack the table and chairs
at the exit, to lay an extra mattress on the floor,
now they just fold up neatly and get tucked into the closet.
Much safer.


I couldn't resits the candle holders,
they are filled with battery operated candles.
They send a nice warm glow from the trailer at night.

This blue chair is super comfy!  It too, can fold right down,
tucking it out of the way.


A few years back this was all carpeted.  Filthy with 
sand and dirt and who knows what else,
so we pulled it out and laid down peel and stick vinyl squares.
Much easier to clean, and has really helps with my allergies.
I scattered a few throw rugs, warming it up a bit
for those chilly mornings.


A message board, great for grocery lists.


We removed the heavy valance, and odd looking 
side curtains.  Opening up the window is a lot easier.


It is amazing what a can of paint can do.
So much brighter!


In the back bedroom, we removed the window covers,
painted the walls and changed out the bedding.
Leaving us with a fresh, cottage feel.  
Now the windows can be open wide and 
the air just breezes through.


This was done with a can of paint 
and a few minor changes...not a lot 
money was spent, but it feels so much more efficient.
Hope you enjoyed seeing the changes.