Showing posts with label painting. Show all posts

Let's go Glamping!


Are you having a good summer?


It seems like it is never long enough!
So,when we get a chance to head out into the great outdoors...
We take it!!
This trailer has been a wonderful home for some great adventures.
Well used,
and more then ready for a little updating! 


Before it had dated valances, dusty rose and blue
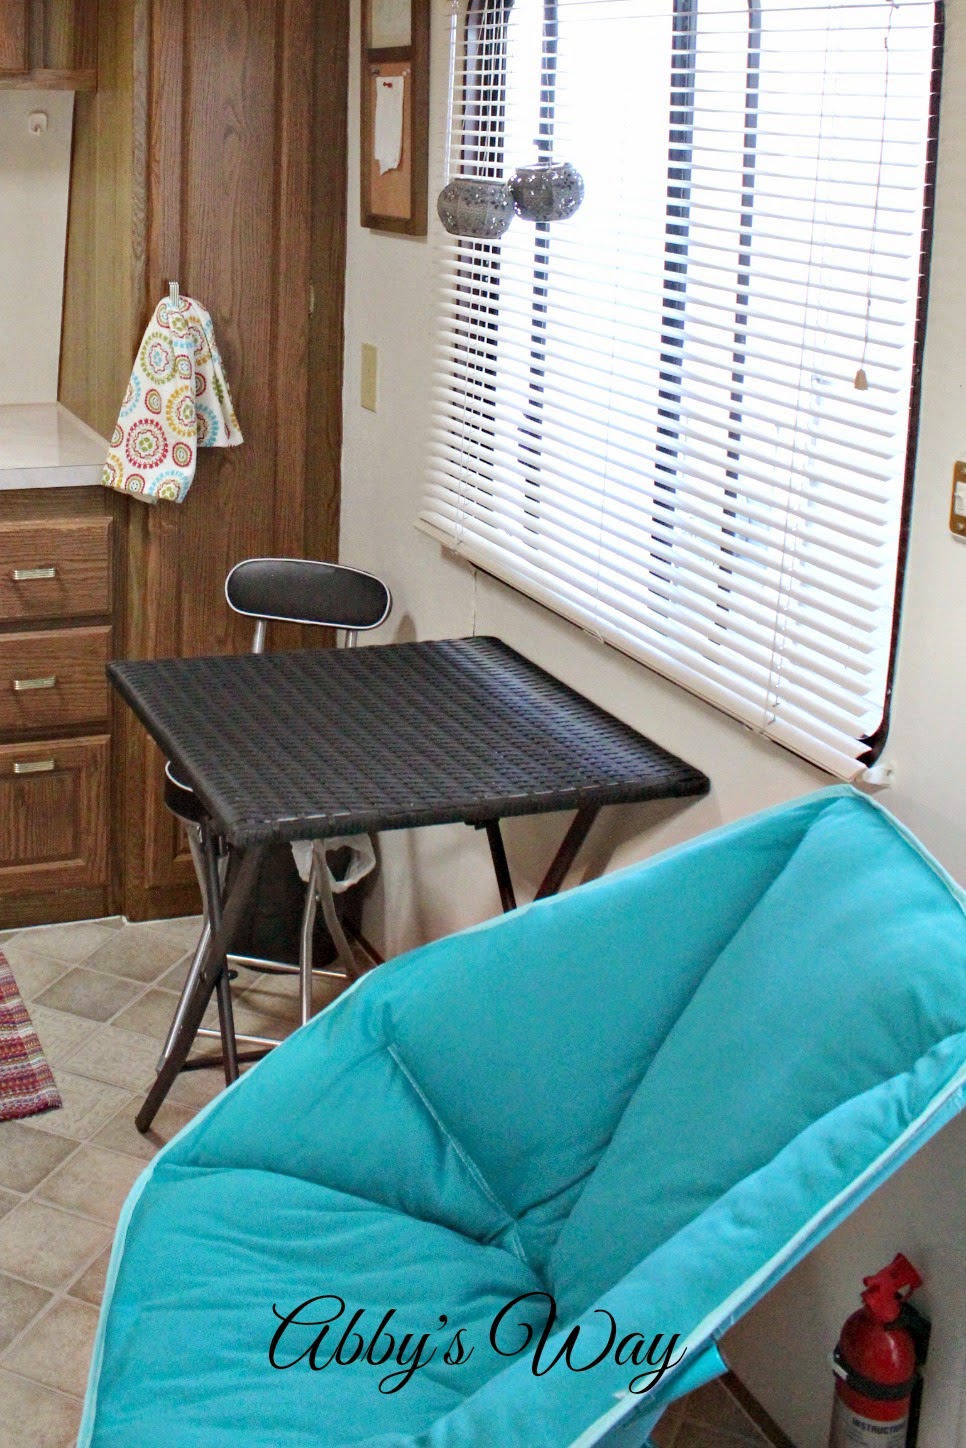
wall paper, and an awkward table and chairs.


We painted the walls off white and left the cupboards,
they are still banged and scraped, but thats ok...
it adds to the character....for now ;)
Before we had to stack the table and chairs
at the exit, to lay an extra mattress on the floor,
now they just fold up neatly and get tucked into the closet.
Much safer.


I couldn't resits the candle holders,
they are filled with battery operated candles.
They send a nice warm glow from the trailer at night.

This blue chair is super comfy!  It too, can fold right down,
tucking it out of the way.


A few years back this was all carpeted.  Filthy with 
sand and dirt and who knows what else,
so we pulled it out and laid down peel and stick vinyl squares.
Much easier to clean, and has really helps with my allergies.
I scattered a few throw rugs, warming it up a bit
for those chilly mornings.


A message board, great for grocery lists.


We removed the heavy valance, and odd looking 
side curtains.  Opening up the window is a lot easier.


It is amazing what a can of paint can do.
So much brighter!


In the back bedroom, we removed the window covers,
painted the walls and changed out the bedding.
Leaving us with a fresh, cottage feel.  
Now the windows can be open wide and 
the air just breezes through.


This was done with a can of paint 
and a few minor changes...not a lot 
money was spent, but it feels so much more efficient.
Hope you enjoyed seeing the changes.


A Teens Chic Bedroom

Our youngest just had her 16th Birthday...


This was her gift...


A New Room! 
Time to remove the "princess".  


 It still has a really pretty feel but
before it was too young.
We knew we wanted to keep the carpet,
its in the basement, and we knew we wanted white
trim work, doors and furniture.  We searched pinterest
and came up with a visual plan. If you click here
you can see the pinterest  board of inspiration.


Once we had our plan we went shopping.
We got lucky, on our second stop in search
of a new comforter we found this one!
She fell in love with it ...so did I.
And it worked with her lavender sheets
YAY!


After purchasing the bedding we headed to
Home Depot and checked out their paint chips
 and curtains. This curtain worked well with the
shadows of the damask and it has 
insulating qualities...perfect!
I just had to hem it up by about 5 inches.
I know, I know I should have raised
 the curtain rod instead, oops.


So, armed with the bedding, curtain and paint chips,
we headed home.  I always like to see the paint chips 
at different times of the day in the room to be painted. 
It  shows me all the shades I will see once
painted on the walls.  I usually change my mind 3 or 4 times
 and then end up with the original pick anyways, but it
 is a process I need to go through.


While we were deciding on a paint color,
 the ceiling got a few coats of white.  The blue ceiling was fun
but really dark...it took a lot of paint to cover it.
Once we had the right grey picked, we painted all the walls
in Porpoise, Berh, flat paint.  It took two coats to cover the purple.
 We let the flat paint dry over night, then the fun
began. We stencilled with the same color paint, in high gloss.
The stencilling was a long process, but worth every minute! 
I have always wanted to try this effect ..gloss on flat
paint...and I LOVE IT.


After walls were finished and the trim freshened up 
I painted her side table and dresser.
I don't know if you can tell in the before picture,
but the dresser had a pink weathered look. I try really hard to
use what we already have.  Partly because I am cheap, but
I also think paint will give it that new lease.  I love
the look of painted furniture...it feels 'cottage-y'.
  I used high gloss,  Dove White, Berh paint. 
 Clean crisp white.


Sadly, the new ceiling light isn't doing it for me. :/
I am not even going to show you...
(it's horrible).
It is too small, and a little awkward...
And there is a heat vent right beside it. 
:/


We kept the closet handles and curtain rod,
they work well with the look we are going for.


A fun look is the Mini Christmas
 lights. We rummaged around in our Christmas 
decorations and pulled out our white lights. 
 They look so pretty over the dresser mirror.


As soon as we got to this point I grabbed my
 camera and snapped all the pictures I could.  Like
 most teens, her room never really looks like this.  
You probably don't like the dumped out
dresser look either.


All we need is the right art work for
some color and it is complete.
Happy Decorating!

Industrial Cottage Style Basement


When we bought this house
the  basement was bare boned.
Except for the outer walls, they were gyproced,
not filled, but just gyproced.
The bedrooms had the 2x4 skeleton walls in
place, wiring and duct work for heat.
There was a bathtub where the bathroom 
was to be and plumbing.  It was COLD.
We knew we needed the space immediately 
for our girls, so we got busy and finished
the two bedrooms and then the bathroom.
You can see the teen bathroom here.


The basement family room has not
been a priority, as long as it was warm and
comfy we didn't worry about it being 2X4s.
But, bit by bit, very slowly, the family
room is coming together.  I thought
I would show you how we have
 been spending our free time.

If you have any sort of storage
war phobia or like wise, please
turn away!
If you are still here.... the fireplace is electric,
but it heats up the family room nicely...
with the help of our furnace.  


This is looking from the office into the storage space.
We made the opening for the door extra large
 for the stand-up freezer, and any larger
items.


The family room has a lot of windows and
gets beautiful sun light through all seasons.


Yes, sadly, like most unfinished spaces,
it was our dumping ground.  I am really hoping
that when the downstairs is finished
everyone will put away after themselves...
please..:))


The picture below is standing at the girls bathroom,
looking down the hallway toward
 the family room.  To the left is the
 doorway to the office and storage,
I was planning on putting a
large barn door there. 


In the picture below, you can see the beam I am 
planning to cover, and make look like 
an aged barn beam.

 Yep, my husband has his priorities.
As soon as the paint was dry the
TV went up and Hockey was back on :))

One of my favorite things we have done in the basement....
STAINED CONCRETE!
It was a TON of work,
 but soooo worth it!
(The green tape was to prevent me from overlapping
 the stain and has been removed.)


We still have a ways to go...
 trim, window covering, furniture, and 
the list goes on!
Right now we are mudding the 
office\computer area....
just waiting till the dust settles!
;)


I can't wait to get decorating down here!
I have been pinning my plans here.


 It is definitely feeling
a lot more Industrial Cottage
then Basement Dumping Ground!
Hope you enjoyed seeing our 
progress.

I am sharing at these link parties,